
Whether you are working with a 1920s bungalow kitchen closed off behind two doorways, a builder-grade kitchen in a 2015 subdivision, or a condo galley you cannot move a single pipe in, the planning process is the same. This guide walks through every decision, in the order a good remodeler asks them, with the real dimensions and trade-offs behind each one.
Written by the design and build team at AMG Proline, a licensed and bonded Illinois remodeling company (IL. #104.020448) with a showroom in Crestwood serving Chicago and the surrounding suburbs. Questions on your own kitchen: (708) 979-3298.
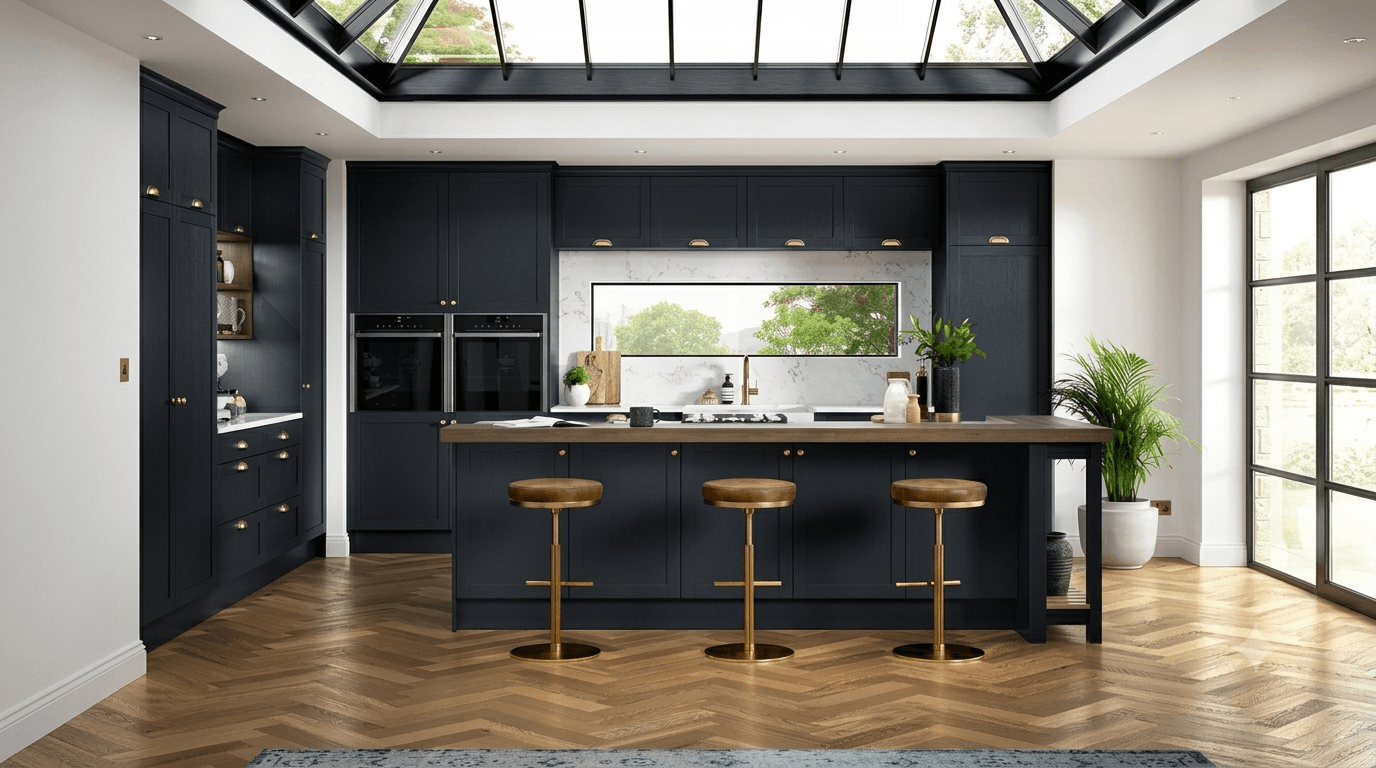
Start Here: The Questions That Decide Everything
Most kitchen projects go wrong at the beginning, not the end. A homeowner arrives with a folder of photos, picks a cabinet door style, and only later discovers the layout they approved has nowhere to put a trash pullout, or that the island they wanted leaves an aisle you cannot open the dishwasher in.
Good design runs the other direction. It starts with how you live, works out to the layout, and only then arrives at finishes. Before you look at a single door sample, answer these.
How do you actually cook?
Not how you would like to cook. How you cook now, in an average week. Someone who reheats and assembles needs a completely different kitchen from someone who breaks down whole chickens, ferments, or cooks with heavy oil and high heat several nights a week.
- Frequency and heat. Daily high-heat cooking drives ventilation, backsplash material, and whether a gas hob or induction is the better call. Occasional cooking does not.
- Number of cooks. One cook needs a 42 inch work aisle. Two cooks working at the same time need 48 inches, and probably a second prep zone.
- Prep style. Heavy chopping and baking prep wants long uninterrupted counter runs, not counter chopped into three-foot pieces by a cooktop and a sink.
- What you buy. Warehouse-club shoppers need pantry depth and bulk storage. People who shop for two days at a time need refrigerator and drawer space instead.
How do you host?
This is the question homeowners most often skip, and it changes the layout more than almost anything else. There is a real difference between a household that seats eight in a dining room twice a year and one where twenty people stand in the kitchen every other weekend.
- Do guests come into the kitchen? If yes, the design has to give them somewhere to be that is not the work aisle. That usually means island seating on the far side, or a beverage zone pulled out of the main triangle.
- Large gatherings or small? Big holiday hosting argues for double ovens, a second dishwasher, and more cold storage. Small dinner parties argue for a good island and better lighting.
- Buffet or plated? Buffet service needs a long landing surface guests can reach without crossing the cooking zone. A peninsula or island edge usually becomes that surface.
- Kids and homework. If the island doubles as a homework and laptop station, seating height, outlet placement, and lighting all change.
Who else uses the room, and for what?
Kitchens in Chicago homes are rarely just kitchens. They are the drop zone by the back door, the place the dog food lives, the mail pile, the charging station, the laundry pass-through in a two-flat. If those functions exist and the design ignores them, they end up on your new countertop.
How long are you staying?
Answer honestly, because it changes what is worth spending on.
- Under three years. Lean toward broad appeal and a scope that stays inside your neighborhood’s price ceiling. Cosmetic and mid-scope work returns better on a short horizon.
- Five to ten years. The middle case, and the most common. Build the layout you want, choose durable surfaces, and avoid finishes so specific that they will read as dated in year eight.
- This is the forever house. Now personal preference legitimately outranks resale math, and it is worth building in aging-in-place features while the walls are open: drawer storage instead of low doors, better task lighting, a wider clear path, lever handles.
What is the house itself telling you?
Age and construction type set hard limits before design starts. A 1926 bungalow with plaster walls, a 60 amp service, and galvanized supply lines has a very different starting point from a 2015 build with a stud-framed open plan. More on this below.
Bring this to your consultation. Write down your answers to the five questions above before you meet any contractor. Designers can work from a bad photo. They cannot work around a homeowner who has not decided whether guests belong in the kitchen. The free in-home consultation goes far better when this part is already done.
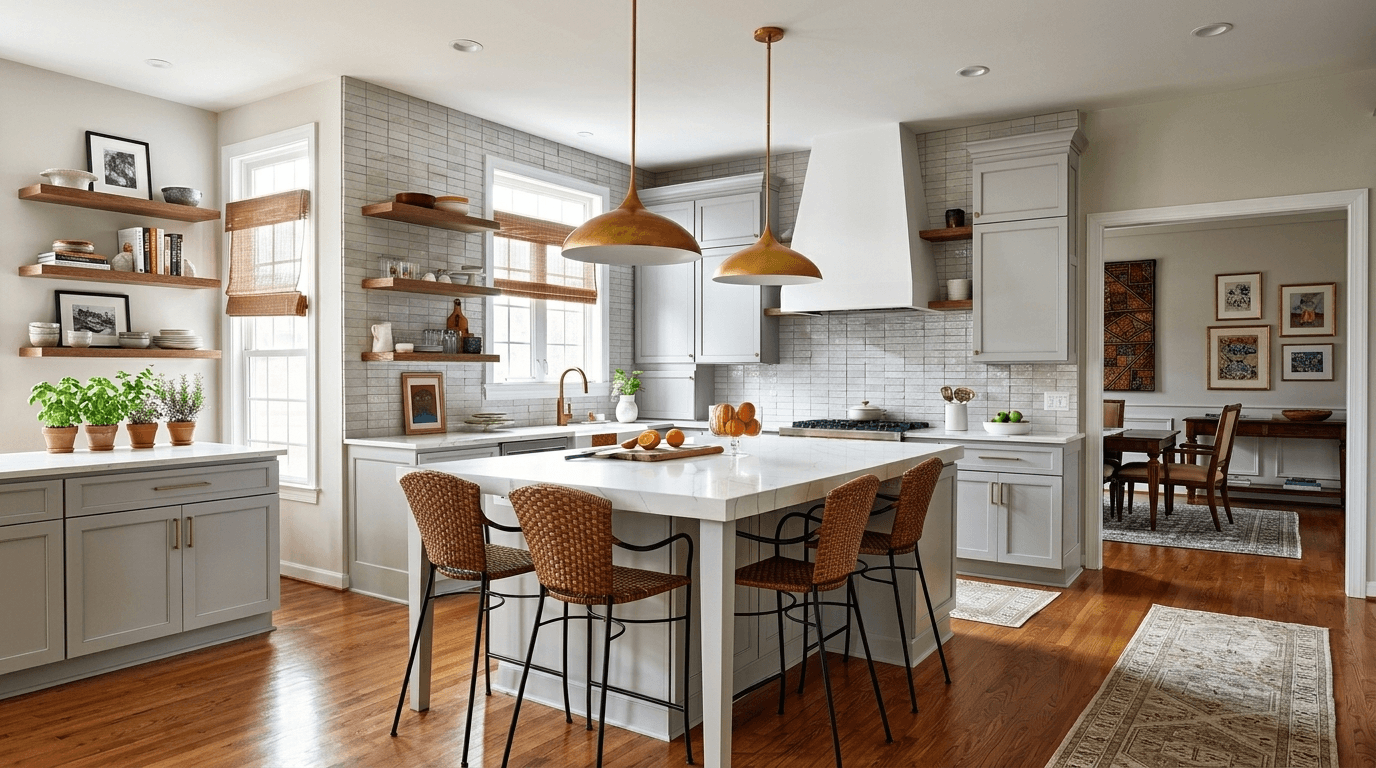
Choosing Your Scope: Refresh, Replace, or Full Gut
Almost every kitchen project falls into one of three scopes. Knowing which one you are in tells you the budget range, the timeline, and whether permits are involved.
| Scope | What it includes | Layout changes | Best when |
|---|---|---|---|
| Cosmetic refresh | Cabinet refacing or repainting, new hardware, new countertop, new backsplash, new sink and faucet, lighting, paint | None. Boxes and plumbing stay put | The layout works, the cabinet boxes are solid, and the kitchen simply looks dated |
| Pull and replace | All new cabinetry, countertops, backsplash, flooring, appliances, lighting, minor plumbing and electrical moves | Minor. Same footprint, sometimes a relocated sink or fridge | Boxes are failing or storage is badly configured, but the room shape is workable |
| Full gut with layout change | Everything above plus wall removal or relocation, new rough plumbing and electrical, structural work, possible window or door changes | Major. New footprint, new work zones | The room is closed off, too small, or laid out in a way no cabinet order can fix |
The honest test between scope one and scope two: open a base cabinet and look at the box, not the door. If the sides are solid, square, and dry, and the drawer boxes still run true, refacing is a legitimate option that saves real money. If the sink base is swollen at the bottom, the boxes are particleboard that has started to sag, or the layout has no drawers where you need drawers, refacing is money spent to keep a problem.
The test between scope two and scope three: draw your ideal layout on the existing footprint. If you can get there without moving a wall, you are in scope two. If every version you draw requires the wall to go, you are in scope three, and you should budget and plan accordingly rather than pretending otherwise halfway through.
New Homes, Older Chicago Homes, and Condos
Newer builds, roughly 1995 onward
The constraints here are mostly economic rather than structural. Framing is standard, the electrical service is usually adequate, and plumbing is modern. What you are typically fixing is builder-grade specification: thin cabinet boxes with no interior fittings, laminate or entry-level stone counters, a soffit above the wall cabinets that wastes a foot of vertical space, recessed lights in the wrong places, and an island sized for a floor plan drawing rather than for actual use.
Two upgrades pay off disproportionately in these kitchens. First, removing the soffit and running cabinets to the ceiling, which adds a full course of storage and instantly makes the room read as custom rather than tract. Second, replacing door-front base cabinets with full-extension drawer banks, which changes daily usability more than any finish.
Older Chicago homes: bungalows, two-flats, and pre-war frame houses
These kitchens were designed for a different way of living: a small work room at the back of the house, closed off from the dining room, with a rear entry, a pantry or broom closet, and often a back porch or mudroom just beyond. There is real opportunity there, and real risk.
Expect to find some combination of the following, and budget for the possibility rather than being surprised by it:
- Plaster and lath walls. Heavier and messier to open than drywall, and they rarely come out clean. Patching to a flat finish is skilled work.
- Out-of-plumb walls and out-of-level floors. Normal in a hundred-year-old house. It matters because cabinet runs and stone countertops are dead straight. Scribing and shimming is part of the job.
- Knob-and-tube or undersized service. A modern kitchen needs multiple dedicated circuits. If the panel is 60 or 100 amps and already full, a service upgrade may be part of the project.
- Galvanized supply lines and cast iron drains. Galvanized pipe corrodes closed from the inside. Once the wall is open, replacing it is far cheaper than doing it later.
- Lead paint. Homes built before 1978 are presumed to contain it, and the EPA Renovation, Repair and Painting rule requires certified firms and contained work practices when disturbing painted surfaces. This is a contractor licensing question worth asking directly.
- Asbestos in old resilient flooring and mastic. Common in mid-century vinyl tile and the black adhesive under it. Testing before demolition is the correct order of operations.
- Cast iron radiators. They eat wall runs. Relocating or converting them is a mechanical decision that has to be made before the cabinet layout is finalized.
The upside is that older homes frequently have space next door to the kitchen that is doing very little: a back porch, an oversized landing, a rear closet, a butler’s pantry that became a broom closet. Annexing that square footage is often cheaper and more effective than trying to reorganize the original room.
Condos and multi-unit buildings
Condo kitchens have a fourth party in the conversation: the association. Before design begins, get the building’s rules in writing.
- Which plumbing risers and stacks are common elements you cannot move
- Whether gas line changes are permitted at all
- Work hours, elevator reservations, and how debris must leave the building
- Whether the association requires proof of insurance from the contractor and a permit copy on file
- Flooring underlayment and sound transmission requirements, which are strict in many Chicago buildings
The practical effect is that condo kitchens are usually pull-and-replace projects rather than full guts. The wet wall stays where it is. Good design in a condo is about making a fixed footprint work harder, not moving it.
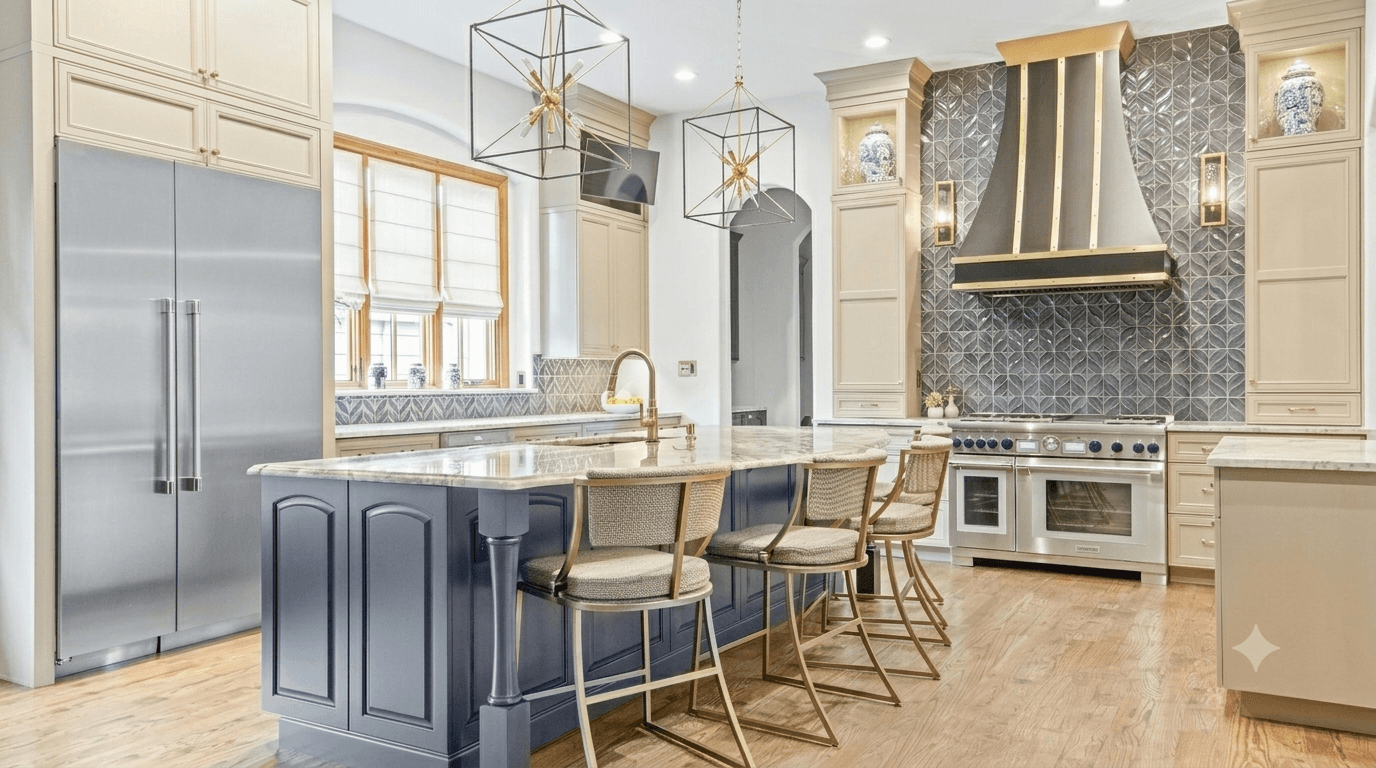
Opening Up a Closed Kitchen
This is the single most requested change in older Chicago homes, and the one most worth thinking through carefully rather than assuming.
What is actually involved
The first question is whether the wall is load bearing. A wall running perpendicular to the floor joists above it is a candidate for load bearing, but this is not something to eyeball. In a full gut, the sequence is: a structural engineer evaluates the wall, specifies a beam or header and the posts and footings that carry it down to the foundation, and that drawing goes into the permit set.
The wall may also carry things that are less visible than load: HVAC ducting, plumbing vents, electrical home runs, and in older homes the return air path for the whole floor. Every one of those has to be rerouted somewhere. This is the most common source of change orders in an open-concept conversion, which is why a contractor who investigates before quoting will give you a number you can rely on.
When open concept is the right answer
- The kitchen is genuinely small and the adjacent room is underused
- You host, and guests currently have nowhere to be
- The kitchen has poor natural light that the adjacent room could share
- You want sightlines to children or a family room while cooking
When it is the wrong answer
Open concept has real costs that showroom photos do not show:
- You lose wall. Wall is where upper cabinets live. Removing a wall can cost you eight to twelve linear feet of storage, which then has to be found somewhere else, usually in an island or a pantry.
- Noise and smell travel. A dishwasher running during a movie, and last night’s fish, both become a whole-floor event. Good ventilation mitigates the second. Nothing fully fixes the first.
- Mess is always visible. Some households genuinely prefer being able to close a door on the dishes.
- Period homes can lose character. In a well-preserved bungalow or greystone, removing every original division can flatten what made the house worth buying.
The middle options most people do not consider
You do not have to choose between a closed room and a completely open floor. Between them sit several options that are cheaper, faster, and often better:
- Widened cased opening. Take the existing doorway to six or eight feet with a header. You get sightlines and light without losing all your wall, and the structural work is far smaller.
- Pass-through with a counter. An opening above counter height keeps the base cabinets and the wall run below, and gives you a serving surface into the next room.
- Partial removal with a peninsula. Take out most of the wall but leave a return, and terminate it in a peninsula. This keeps a defined kitchen while opening the sightline.
- Pocket or barn doors. Open when you want it open, closed when you are hosting and the kitchen looks like a kitchen.
Layout and the Clearances That Govern It
Layout is the part of a kitchen you cannot change later. Finishes can be swapped in ten years. The location of the sink cannot, not without opening walls again.
The common layouts
| Layout | Description | Works well when |
|---|---|---|
| One wall | All cabinets and appliances on a single run | Condos, small units, and studio-style spaces. Often paired with an island opposite |
| Galley | Two parallel runs with an aisle between | Narrow rooms. Extremely efficient to cook in, poor for hosting |
| L shape | Two connected runs on adjoining walls | Open plans. Leaves a natural corner for the work zone and room for a table or island |
| U shape | Three connected runs | Maximum storage and counter per square foot. Needs enough width to keep aisles legal |
| L or U with island | Perimeter run plus a freestanding island | The most common goal in Chicago remodels. Requires real floor area, see sizing below |
| Peninsula | A run that projects from the perimeter, connected at one end | Rooms that cannot fit a true island but want seating and a barrier |
The numbers that decide whether a layout is legal and livable
These are the clearances a designer checks before anything else. If a layout you like violates them, it is not a layout, it is a wish.
| Dimension | Target | Why |
|---|---|---|
| Work aisle, one cook | 42 inches minimum | Room to open a dishwasher or oven door and still pass behind it |
| Work aisle, two cooks | 48 inches | Two people working back to back without collision |
| Walkway, no work on either side | 36 inches minimum | Pure circulation path |
| Clear doorway width | 32 inches minimum | Appliance delivery and accessible passage |
| Work triangle, each leg | 4 to 9 feet | Sink, cooking surface, and refrigerator within efficient reach |
| Work triangle, total | 13 to 26 feet | Below this the zones crowd, above it you are walking too far |
| Landing beside the cooking surface | 12 inches one side, 15 inches the other | Somewhere to set a hot pan down |
| Landing beside the refrigerator | 15 inches | Somewhere to set groceries while the door is open |
| Landing beside the sink | 24 inches one side, 18 inches the other | Prep space and a drying zone |
| Dishwasher to sink | Within 36 inches | Loading without dripping across the floor |
The zone model. The classic work triangle assumes one cook and one of each appliance. Most modern kitchens are better planned as zones: a wet zone at the sink and dishwasher, a hot zone at the hob and oven, a cold zone at the refrigerator, a prep zone with the longest clear counter, and a storage zone for pantry and dishes. Plan the zones first, then check the triangle numbers hold.
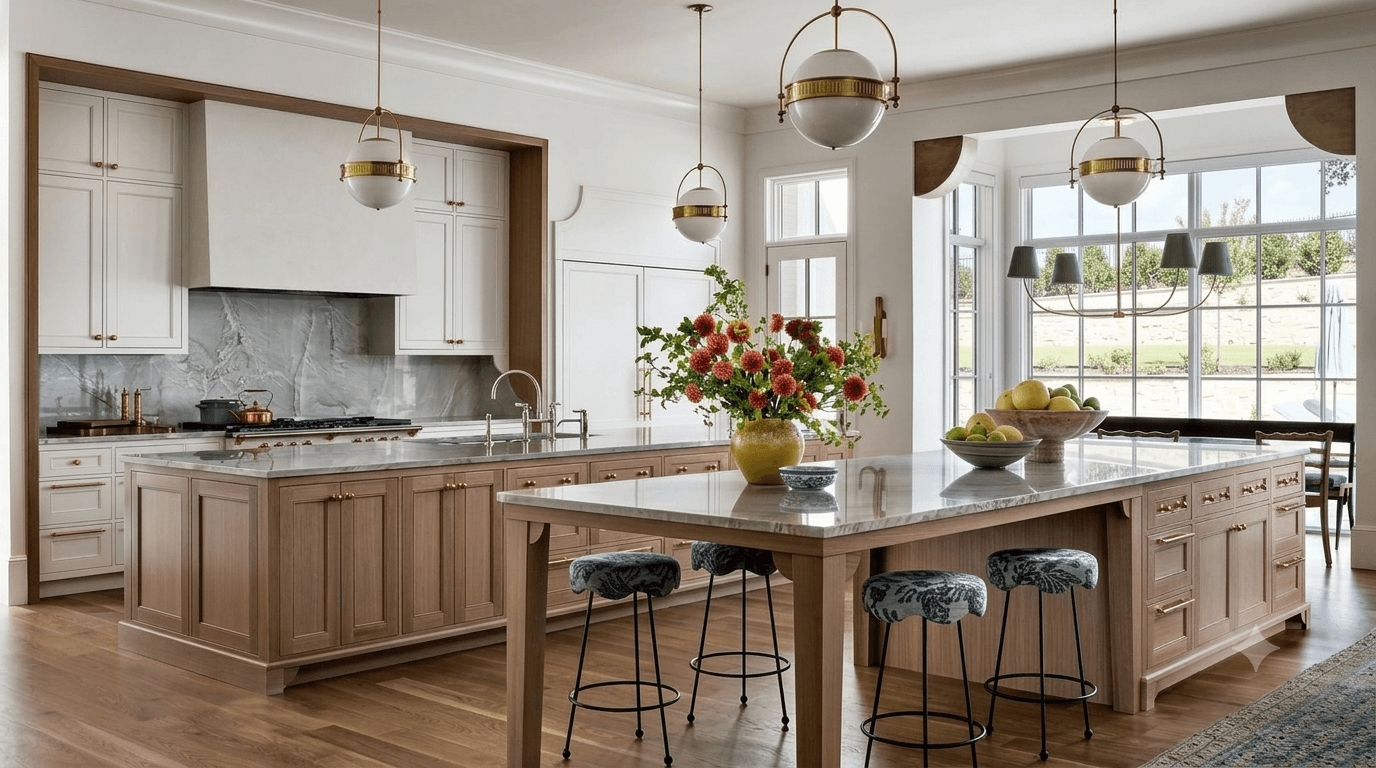
How Much Storage Do You Actually Need?
“More storage” is the most common request and the least specific. Here is how to turn it into a number.
Audit what you have before you design what you want
Empty every cabinet and drawer onto the dining table and sort into four piles: daily, weekly, seasonal, and never. The never pile leaves the house. The seasonal pile does not need prime kitchen real estate. What is left is your actual storage requirement, and it is almost always smaller than people assume and differently shaped than what they have.
Then measure what you have now in linear feet of cabinet run, counting base and wall separately, and count your drawers. Those two numbers give your designer a baseline to beat.
Rules of thumb worth knowing
- Drawers beat doors for base cabinets. A 24 inch deep base cabinet with doors means kneeling and reaching into a dark box. The same cabinet as a three-drawer bank gives you the full depth, visible, at standing height. For most households, converting base cabinets to drawers is the single biggest usability gain available.
- Going to the ceiling adds a full course. Standard 30 inch wall cabinets in an 8 foot ceiling leave a soffit or a dust shelf above. Using 36 or 42 inch wall cabinets, or stacked uppers with glass fronts on top, converts dead air into seasonal storage.
- Deep corners waste more than people realize. A blind corner base cabinet can swallow six cubic feet you will never see again. Corner pullouts, lazy susans, or a diagonal corner sink base all recover it.
- Store at the point of use. Pots near the hob. Dishes near the dishwasher, not across the room. Baking near the longest counter run. This is a layout decision, not a cabinet decision.
Interior fittings that earn their cost
- Full-extension soft-close drawer glides on every drawer, not just the top one
- A two-bin pullout for trash and recycling, adjacent to the prep zone
- Vertical tray dividers for sheet pans, cutting boards, and platters
- A pullout spice or oil cabinet beside the hob
- Drawer peg systems for plates and bowls in deep drawers
- A pullout pantry for tall bottles and dry goods where a full pantry does not fit
- Toe kick drawers, which recover a surprising amount of flat storage
- An appliance garage or a dedicated small-appliance drawer, so the counter stays clear
Pantries: Do You Have One, and Do You Need One?
Ask two questions. How do you shop, and where does the food currently overflow to? If you buy in bulk, or if dry goods have colonized a hall closet or the basement stairs, you need pantry capacity, and building it into the design is cheaper than adding it later.
| Type | Space required | Notes |
|---|---|---|
| Cabinet pantry | A 24 to 36 inch wide tall cabinet run | Simplest option. Best with pullout shelves, since a fixed 24 inch deep shelf buries the back row |
| Pullout pantry | 9 to 18 inches of cabinet width | Fits where nothing else does. Excellent for cans, bottles, and boxes. Limited for bulky items |
| Reach-in closet pantry | Roughly 24 to 30 inches deep by 3 to 5 feet wide | Shelves 12 to 16 inches deep work best. Deeper than 16 inches and things vanish at the back |
| Walk-in pantry | Around 5 by 5 feet minimum with a 36 inch clear path | The dream option, but it takes real square footage away from the kitchen. Worth it in larger homes |
| Butler’s pantry | A transitional run between kitchen and dining | Common in older Chicago homes. Ideal spot for a beverage zone, glassware, and serving pieces |
In older Chicago houses, the pantry question often answers itself. Many bungalows and two-flats had one originally and it was converted to a closet, a powder room, or absorbed into the kitchen at some point. Restoring that function, sometimes literally in the same footprint, is one of the most satisfying moves available in a period home.
Practical tip. If a pantry does not fit, a full-height cabinet run on one wall with pullout interiors gets you eighty percent of the benefit. The mistake is deep fixed shelving with no pullouts, which looks like storage and behaves like a hole.
Cabinets: Sizes, Construction, and Reface Versus Replace
Cabinetry is normally the largest single line in a kitchen budget, and the decision with the longest life. Everything else in the room is installed against it.
Standard dimensions
| Component | Standard size |
|---|---|
| Base cabinet height | 34.5 inches, reaching 36 inches with countertop |
| Base cabinet depth | 24 inches, roughly 25 to 25.5 inches with countertop overhang |
| Wall cabinet depth | 12 inches standard, 15 or 24 inches over a refrigerator or hood |
| Wall cabinet heights | 30, 36, or 42 inches |
| Tall or pantry cabinet | 84, 90, or 96 inches |
| Cabinet widths | 9 to 48 inches, in 3 inch increments |
| Counter to underside of wall cabinet | 18 inches standard, 20 to 24 inches behind a hob |
| Toe kick | 4 inches high, 3 inches deep |
| Island counter height | 36 inches standard, 42 inches for a raised bar, 30 inches for a table-height section |
Ceiling height drives the wall cabinet choice. In an 8 foot ceiling, 30 inch uppers leave a soffit, 36 inch uppers reach a trimmed ceiling cleanly, and 42 inch uppers require removing the soffit. In a 9 foot ceiling, 42 inch uppers or stacked cabinets with glass fronts on the upper tier are the two good answers. Above 9 feet, stacking is almost always better than one enormous door.
Construction quality: what to actually look at
- Box material. Plywood boxes resist moisture and hold fasteners better than particleboard, especially in the sink base. Ask what the box is, not just what the door is.
- Drawer boxes. Solid wood with dovetail joints outlasts stapled or doweled boxes by a wide margin.
- Hardware. Full-extension undermount glides with soft close, and six-way adjustable hinges. This is where cheap cabinets reveal themselves within two years.
- Frameless versus face frame. Frameless, sometimes called full access or European, gives roughly ten percent more usable interior and a flush modern look. Face frame is the traditional American construction, stiffer, and the right choice for inset doors and period styles.
- Door style and finish. Shaker remains the safest choice across almost every house style. Slab doors read modern. Raised panel reads traditional. Painted finishes should be a catalyzed conversion varnish or similar, not a brushed latex.
Reface, repaint, or replace
| Option | What happens | Choose it when |
|---|---|---|
| Repaint | Existing doors and boxes are cleaned, prepped, and sprayed | Solid wood doors in good condition, layout already works, tightest budget |
| Reface | New doors, drawer fronts, and hardware on existing boxes, with matching veneer on exposed sides | Boxes are sound and correctly configured, but the doors are dated or damaged |
| Replace | New cabinetry throughout, sized and configured to a new plan | Boxes are failing, storage is badly configured, or the layout is changing at all |
Refacing has one hard limit worth stating plainly: it cannot change the layout. If your complaint is that the cabinets are ugly, refacing solves it. If your complaint is that there is nowhere to put anything, refacing does not, and you will be looking at the same problem behind nicer doors.
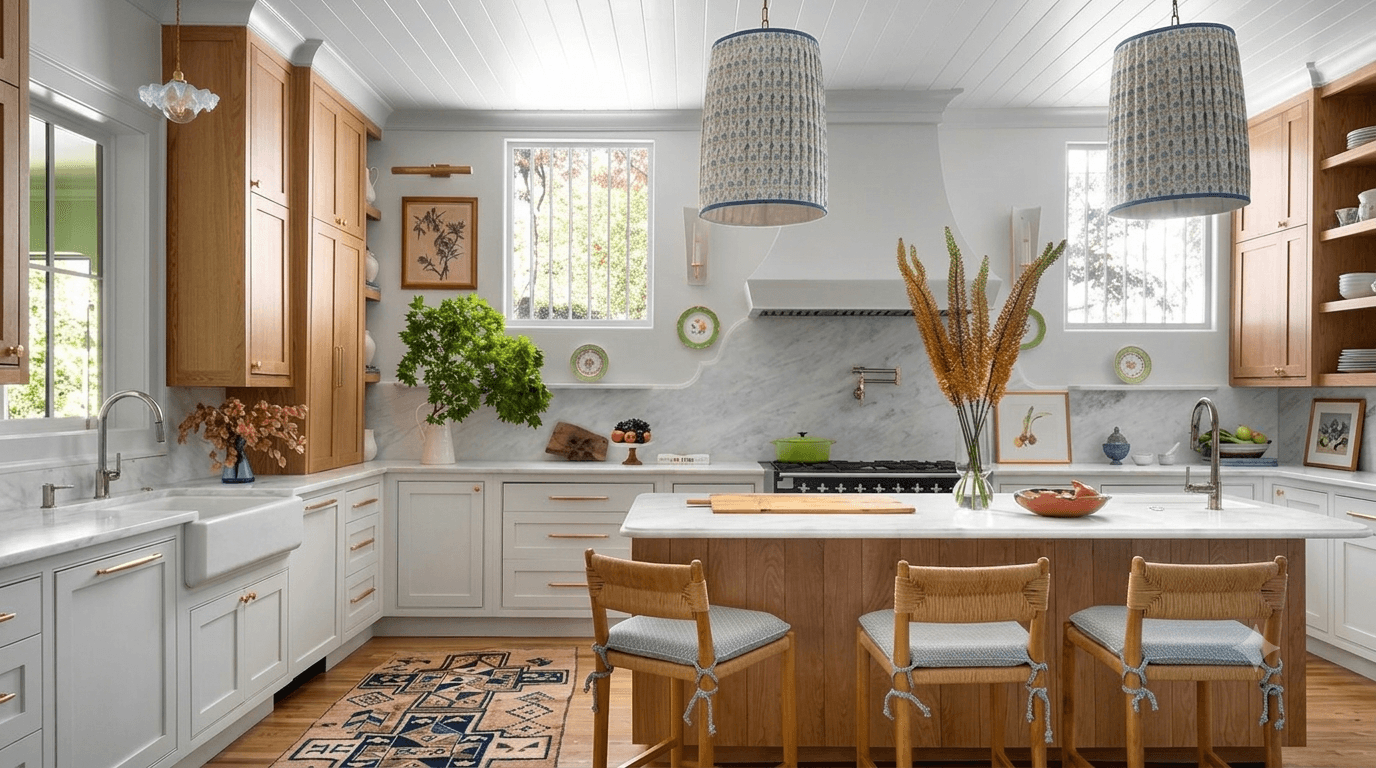
Islands and Peninsulas: The Sizing Question
The island is the most requested feature and the most frequently forced into a room that cannot hold one. The math is not negotiable.
Does an island fit?
Work it out with addition. A standard base cabinet is 24 inches deep. An island needs a minimum 42 inch aisle on every side that gets used, and 48 inches if two people work or if a seating side has traffic behind it.
- Perimeter cabinets on both sides: 24 + 42 + island depth + 42 + 24. With a 24 inch island that is 156 inches, or 13 feet of room width as a practical minimum.
- Cabinets on one side only: 24 + 42 + island depth + 42. With a 24 inch island that is 132 inches, or 11 feet.
- Adding seating on one side adds the overhang, typically 15 inches, plus 44 inches or so of clear space behind the stools for someone to pass.
If the room is under about 11 feet wide, an island will make the kitchen worse, not better. A peninsula is the correct answer in that situation, and a good peninsula outperforms a cramped island in every way.
Island sizing and seating
| Dimension | Guidance |
|---|---|
| Minimum useful size | Roughly 4 feet long by 2 feet deep. Smaller reads as a cart, not an island |
| Comfortable size | 7 feet by 3 feet gives a genuine prep surface plus seating |
| Clearance all sides | 42 inches minimum, 48 inches where two people work |
| Width per seat | 24 inches. Three stools need 72 inches of clear run |
| Knee overhang, 36 inch counter | 15 inches |
| Knee overhang, 42 inch bar | 12 inches |
| Knee overhang, 30 inch table height | 18 inches |
| Overhang support | Past roughly 10 to 12 inches unsupported, add corbels, brackets, or a steel plate per the fabricator’s specification |
Single level or two level?
A single-level island at 36 inches looks cleaner, photographs better, and gives you one continuous work surface. A two-level island with a raised 42 inch bar hides prep mess from seated guests and defines the seating zone. Single level has been the stronger design direction for some years, but if you host constantly and hate looking at dishes, the raised bar exists for a reason.
Putting utilities in the island
A sink or a hob in the island changes the plumbing and electrical scope significantly, since the supply, drain, vent, and in the case of a hob the ductwork all have to run under the floor. In a slab-on-grade or a condo, that may be impossible. In a basement-over house it is usually straightforward. Decide this early, because it is a structural and mechanical decision, not a finish decision.
Electrical receptacle requirements for islands have changed across recent code cycles and are adopted differently by different Illinois municipalities. Your electrician will confirm what applies to your address.
Sinks: One or Two, and What Kind
Do you need a second sink?
Most kitchens do not. A prep sink is genuinely useful in a specific set of circumstances, and decorative in the rest.
A second sink is worth it when:
- Two people regularly cook at the same time, and the main sink becomes a bottleneck
- The kitchen is large enough that the island is a genuinely separate work zone, not two steps from the main sink
- You entertain often and want a beverage or bar zone that does not intrude on the cleanup zone
- The work triangle is long, and a prep sink shortens the real walking distance
Skip it when:
- The island is within a few steps of the main sink, in which case it becomes a hole in your best counter run
- The island is your only large prep surface, since a sink cuts it in half
- The plumbing run is difficult and the budget is better spent elsewhere
If you do add one, a prep sink is typically 15 to 18 inches wide, and it needs its own drain, vent, and usually a dedicated disposal decision.
Single bowl or double bowl?
Single bowl has become the default for good reason: you can lay a sheet pan or a roasting rack flat in it, which a double bowl cannot do. Double bowl still makes sense if you wash a lot of items by hand and want a wash-and-rinse workflow, or if you want to keep one side clear while the other is full. A common compromise is a large-and-small split, sometimes called a low divide, which gives you most of the flat capacity while retaining separation.
Sizing to the cabinet
Sinks are sized to the base cabinet beneath them. A 30 inch sink needs a 33 inch sink base, a 33 inch sink needs a 36 inch base, and farmhouse sinks require a purpose-built apron base rather than a standard one. Decide the sink before the cabinets are ordered, not after, because it changes the cabinet order.
Mounting and material
| Option | Pros | Cons |
|---|---|---|
| Undermount | Wipe crumbs straight in, no rim to clean around, the standard with stone counters | Requires a solid surface countertop, not laminate |
| Drop-in | Lower cost, works with any countertop | The rim collects grime and interrupts the counter |
| Farmhouse or apron front | Large capacity, less leaning over the counter edge, strong visual anchor | Custom cabinet required, heavier, more expensive |
| Workstation sink | Integrated ledge for boards, racks, and colanders, effectively adding prep surface | Higher cost, accessories need storage when not in use |
| Stainless steel | Durable, forgiving, repairable, wide price range. Look for 16 to 18 gauge and sound-deadening pads | Shows water spots, thin gauge sinks are loud |
| Fireclay or cast iron | Very durable finish, classic appearance, quiet | Heavy, requires cabinet support, can chip dropped glassware |
| Granite or quartz composite | Quiet, resists scratching and staining, matte finish hides water spots | Limited color range, can be damaged by very high heat |
Countertop Materials Compared
This is the decision homeowners agonize over most. The honest summary: quartz and granite are the two workhorses, marble is a beauty-first choice with real maintenance, and everything else is situational. Here is the full picture.
| Material | Pros | Cons | Best for |
|---|---|---|---|
| Quartz (engineered) | Non-porous, so no sealing and high stain resistance. Consistent color and pattern across slabs. Very hard and scratch resistant. Huge range of designs, including convincing marble looks | Not as heat resistant as natural stone, so trivets are required. Can discolor under prolonged direct sunlight. Patterns repeat, so it lacks the one-of-a-kind quality of natural stone | Busy households, families, anyone who wants a marble look without marble maintenance |
| Granite | Natural stone, every slab unique. Excellent heat resistance. Very hard and durable. Wide price range including affordable options | Porous, so periodic sealing is needed. Color and veining vary within a slab, so you should select your actual slab. Some patterns read dated if chosen poorly | Heavy cooks, traditional kitchens, buyers who want natural stone at a reasonable price |
| Marble | Unmatched depth and character. Naturally cool, which bakers prefer. The classic luxury surface | Calcite based, so acids etch it. Lemon, wine, vinegar, and tomato leave dull marks that are not stains and cannot be cleaned off. Softer than granite, so it scratches. Requires sealing and accepting a patina | Homeowners who love the look and genuinely accept the wear, or as an island accent, a baking station, or a backsplash rather than a full run |
| Quartzite | Natural stone with marble-like veining but far harder. Excellent heat resistance | Expensive. Requires sealing. Some stones sold as quartzite are actually dolomitic marble and behave accordingly, so verification matters | Buyers who want the marble look in natural stone without marble’s softness |
| Porcelain slab | Extremely hard, heat resistant, UV stable so it suits sunny rooms and outdoor kitchens. Very thin profile possible | Edges can chip and usually need a mitered treatment. Pattern is printed on the surface, so a deep chip shows the body. Fewer experienced fabricators | Modern designs, waterfall edges, very sunny kitchens |
| Butcher block | Warm, affordable, repairable by sanding. Excellent as a dedicated chopping section | Needs regular oiling. Poor choice around a sink. Scorches and dents | An island accent or a baking section, rarely a whole kitchen |
| Solid surface | Seamless appearance including integrated sinks. Repairable, since scratches sand out. Non-porous | Less heat resistant than stone. Reads less premium to buyers than stone does | Seamless designs and situations where repairability matters most |
| Laminate | Lowest cost by a wide margin. Modern printing has improved dramatically | Water damages the seams and substrate. Not repairable. Cannot take an undermount sink | Rentals, short-horizon flips, and strict budgets |
Specification details that matter
- Thickness. 3cm is the standard for a full-thickness look and does not require a plywood substrate. 2cm costs less and is often built up at the edge to look thicker.
- Edge profile. Eased and square edges read modern. Bullnose and ogee read traditional. A mitered edge creates a thick slab look from thinner material.
- Seams. Any run longer than a slab will have one. Ask where the seams will fall before fabrication and get them placed somewhere unobtrusive rather than in the middle of your prep zone.
- Slab selection. For granite, marble, and quartzite, go to the yard and select the actual slabs. Natural stone varies enormously, and a photo of a sample chip tells you nothing.
- Templating. Fabricators template after cabinets are installed, not before. This is a fixed step in the schedule and typically accounts for a gap of a week or more between cabinet install and countertop install.
Backsplashes
The backsplash is the cheapest place in a kitchen to add personality and the easiest place to overreach. It is also the last major finish decision, which means you can wait until the cabinets and countertop are in the room before committing.
How high should it go?
- 4 inch splash. A short return in the counter material. Cheapest, dated in most contexts, still reasonable in a rental or a budget refresh.
- Counter to underside of wall cabinet, typically 18 inches. The standard. Protects the working wall and is the most common specification.
- Full height to the ceiling. Usually behind a range or on a hood wall, or across a whole wall where there are no upper cabinets. Dramatic, and it makes a small kitchen feel taller.
- Slab backsplash. The countertop material carried up the wall. Seamless, easy to clean, and the most premium looking option. It costs the most and needs precise templating.
Materials and patterns
- Ceramic and porcelain tile. The default for good reason. Durable, affordable, endlessly variable. Porcelain is denser and less prone to chipping.
- Glass tile. Bright and reflective, excellent in kitchens with poor natural light. Shows installation flaws readily, so it demands a good tile setter.
- Natural stone tile. Marble, travertine, and slate. Beautiful, but porous and needs sealing, and it will pick up grease behind a hob.
- Zellige and handmade tile. Irregular and full of character. Accept that irregularity is the point, not a defect.
On pattern: running bond, the classic offset, is the safe default. Stack bond reads modern and geometric. Herringbone and chevron add movement and cost more to install because of the cutting. Vertical stack has become a common way to make a ceiling feel higher. The larger the pattern’s visual energy, the quieter the countertop should be.
Grout, and why it decides more than the tile
Grout color changes the entire read of a backsplash. Matching grout makes the surface look like a single field. Contrasting grout makes each tile a graphic element. Behind a cooking surface, epoxy grout resists staining and grease far better than cement grout, and it is worth the upcharge in that zone specifically. Silicone, not grout, belongs in the corner joint where the backsplash meets the countertop, because that joint moves.
Hob, Oven, and Hood
Range, or separate hob and wall oven?
A freestanding or slide-in range puts both functions in a 30 or 36 inch slot and costs less. Separating them, with a hob in the counter and a wall oven in a tall cabinet, costs more and consumes more wall, but it puts the oven at a comfortable height, frees the counter run under the hob for a drawer bank, and lets two people work the hot zone simultaneously. Households that bake heavily or cook for crowds usually prefer the split. Most others are well served by a good range.
Gas, induction, or electric
| Type | Pros | Cons |
|---|---|---|
| Gas | Instant visual feedback, works with any pan, familiar to most cooks, and works during a power outage | Less efficient, adds heat and combustion byproducts to the room, so ventilation matters more. Grates are harder to clean |
| Induction | Fastest heat, very precise, the surface itself stays relatively cool, easiest to wipe clean, and it puts far less waste heat into the room | Requires magnetic cookware. Needs a dedicated 240 volt circuit, which in an older Chicago home can mean panel work. Higher upfront cost |
| Radiant electric | Lowest cost, flat and easy to clean, no gas line needed | Slow to respond, surface stays hot after use |
The practical Chicago note: if there is no gas line at the cooking location and running one is difficult, induction is often the better answer than fighting the plumbing, provided the panel can carry the circuit.
Ovens
- Single oven is sufficient for most households. Prioritize convection over a second cavity if choosing one.
- Double wall ovens matter for heavy holiday hosting, where two dishes need different temperatures at once.
- Oven plus a speed or microwave oven is the more common modern pairing, and usually more useful than two full ovens.
- Microwave placement. A microwave drawer in the island or a base cabinet keeps sightlines clean and is far easier for children and shorter adults to use safely than an over-the-range unit. The over-the-range combination unit saves space but compromises ventilation badly.
Ventilation: the part people underspend on
A hood is not decoration. It removes grease, moisture, combustion byproducts, and odor. In an open-concept kitchen, poor ventilation means the whole floor smells like dinner for a day.
- Width. The hood should be at least as wide as the cooking surface. Extending 3 inches past each side captures noticeably better.
- Mounting height. Typically 24 to 30 inches above the cooking surface, but always follow the manufacturer’s specification, which varies by model and fuel type.
- Airflow. A common sizing rule is roughly 100 CFM per linear foot of cooktop for electric, and for gas, total burner BTU divided by 100. Size for how you actually cook, not for the maximum number on the box.
- Ducted, not recirculating. A recirculating hood filters grease and returns the air to the room. It does nothing for heat or moisture. Duct outside wherever it is physically possible, keeping the run short and straight with smooth-wall duct.
- Makeup air. High-CFM hoods pull enough air out of a tight house to affect combustion appliances, and makeup air provisions are commonly triggered around 400 CFM. Confirm the requirement for your municipality before specifying a large hood.
Flooring, Lighting, and the Systems Behind the Walls
Flooring
- Porcelain tile. The most durable and water-resistant option. Cold underfoot, which is why in-floor heat pairs well with it. Hard on dropped dishes and on legs during long cooking sessions.
- Luxury vinyl plank. Warm, quiet, waterproof, forgiving, and affordable. The practical choice for families and for condos with sound requirements.
- Hardwood. The right answer when the kitchen opens to hardwood elsewhere, because continuity of floor makes an open plan read as one room. Refinishing the whole floor at once gives a seamless match that a patch never will.
Lighting, in three layers
- Ambient. General room light, usually recessed cans on a grid roughly 4 feet apart, or a central fixture in smaller rooms.
- Task. Undercabinet lighting is the single highest-impact lighting upgrade in a kitchen. Without it, your own body shadows every counter you work on. Specify a continuous strip or bar, not puck lights that scallop.
- Accent. Pendants over an island, interior cabinet lighting behind glass fronts, toe kick lighting.
Island pendants generally hang with the bottom 30 to 36 inches above the countertop, spaced around 30 inches apart, with two or three fixtures depending on island length. Put everything on dimmers, and choose a consistent color temperature throughout, commonly around 2700K to 3000K for a warm residential feel.
Electrical and plumbing
A modern kitchen needs several dedicated circuits: refrigerator, dishwasher, disposal, microwave, and at minimum two small-appliance counter circuits, plus a 240 volt circuit for an electric range or induction hob. Countertop receptacles require GFCI protection. In older homes, the question is often whether the existing panel can carry it, and a service upgrade may belong in the budget.
On the plumbing side, Illinois requires plumbing work to be performed by a licensed plumber. If galvanized supply lines or cast iron drains are exposed during demolition, replacing them while the wall is open is dramatically cheaper than returning later.
Color and Finish Direction
Color is the last decision and the one people start with. Doing it in the right order makes it much easier.
Work from fixed to flexible
Choose in this sequence: first anything you are keeping (existing floor, an adjacent room’s wall color, a stone you have fallen in love with), then cabinetry, then countertop, then backsplash, then paint, then hardware and fixtures. Paint is the easiest thing in the room to change and should never be the constraint everything else bends around.
Read the light in the actual room
North-facing Chicago kitchens get cool, indirect light that pushes grays toward blue and can make a white look sterile. South-facing rooms get warm light that flatters creams and warm whites. Always test large samples on the actual walls and look at them at three different times of day, including under the artificial light you will be using at night.
Direction that holds up
- Warm neutrals over cool grays. The market has moved decisively toward warm whites, greiges, bone, and mushroom. Cool gray kitchens now read as mid-2010s.
- Wood is back. Natural and stained wood cabinetry, particularly white oak and walnut, has returned strongly, often mixed with painted cabinetry rather than replacing it.
- Two-tone is the safe way to use color. Painted perimeter with a contrasting island, or wood uppers with painted bases. You get personality without committing the whole room.
- Green and deep blue are the durable accent colors. Muted sage, olive, and deep navy have proven far more lasting than the saturated trend colors that preceded them.
- Mixing metals is fine, with a rule. Pick one dominant finish for cabinet hardware and one accent for plumbing or lighting. Two finishes read intentional. Four read accidental.
The resale question. If you are selling within three years, keep cabinetry and countertops in the neutral range and put your personality in the backsplash, hardware, lighting, and paint. Those are the four cheapest things for a buyer to change, which is exactly why they are the safe place for a bold choice. If this is your long-term home, build the kitchen you want.
Designing a Kitchen for Hosting
If you entertain regularly, a few specific moves make an enormous difference, and none of them are about how the kitchen looks.
- Give guests a destination outside the work aisle. Island seating on the opposite side from the range, or a beverage zone at the far end of the run. People will stand where the drinks are. Put the drinks somewhere useful.
- A beverage zone that is not the main sink. An undercounter beverage refrigerator, a small run of counter, and glass storage above. It keeps guests out of the cooking triangle entirely and is one of the highest-satisfaction additions in an entertaining household.
- A second dishwasher, or at least a second dishwasher’s worth of planning. For households that host twenty people regularly, a second dishwasher outperforms almost any other appliance upgrade. Where it does not fit, an oversized single-bowl sink and a large drying zone are the fallback.
- A buffet-capable surface. A long island edge, a peninsula, or a butler’s pantry counter that guests can reach without walking through the hot zone.
- Traffic paths that do not cross the range. Map the route from the front door to the drinks to the food to the table. If any leg of that route passes in front of an open oven, redesign it.
- Lighting on dimmers, zoned. Bright task light while cooking, low ambient light while eating. One switch controlling everything makes a kitchen feel like an office at 9pm.
Budget: Where the Money Actually Goes
Every kitchen is different, and anyone quoting a fixed national number is guessing. What is consistent is the shape of the spend.
- Cabinetry is usually the largest single line in a full remodel, often by a wide margin. It is also the line where quality differences are most visible over a ten-year horizon.
- Labor is the second heavyweight, and it rises sharply with complexity. Moving plumbing, opening walls, and correcting an old house’s geometry are labor costs, not material costs.
- Countertops, appliances, flooring, tile, lighting, and fixtures divide the remainder, and these are the lines with the widest range between reasonable and extravagant.
- Hold a contingency of 10 to 15 percent on any project involving an older home. Not because a good contractor cannot plan, but because nobody can see inside a wall until it is open.
Where to spend and where to save
Spend on: cabinet box construction and hardware, layout and plumbing work you cannot easily redo, ventilation, and lighting. These are structural to how the kitchen functions and expensive to revisit.
Save on: decorative hardware, faucets within reason, pendant fixtures, and backsplash tile. These are all changeable in a weekend later, which makes them the right place to control cost now.
The neighborhood ceiling
There is a practical limit to how much kitchen a house can carry. A kitchen finished well above what comparable homes in the area offer will still be a pleasure to live in, but the market will not pay the full difference back. Ask your agent, or a contractor who works your area constantly, where that ceiling sits for your block before finalizing scope.
What Actually Adds Resale Value
Two independent industry data sets are worth knowing here, and they point in slightly different directions, which is exactly why both are useful.
Cost recovery at resale
Zonda’s 38th annual Cost vs. Value report, published through the Journal of Light Construction, found that eight of the ten highest-returning projects nationally were exterior replacements. The one interior remodel to break into the top five was the minor kitchen remodel, described in the report as a modest face-lift of what is widely considered the most important room in the house.
The report is equally clear about the pattern behind that result: the more complex and more personalized the project, the lower the percentage of cost recovered at sale. Large discretionary remodels reflect the specific choices of the homeowner who commissioned them, and those choices do not have universal appeal to buyers. That is not an argument against remodeling. It is an argument for being honest about which kind of value you are buying.
One regional note that matters locally: the report found returns in the East North Central region, which includes Illinois, strengthened relative to several other regions in the most recent cycle.
Satisfaction, which is the other kind of return
The National Association of Realtors and the National Association of the Remodeling Industry publish the Remodeling Impact Report, which scores projects on homeowner happiness rather than resale. In the 2025 edition, a kitchen upgrade received a perfect Joy Score of 10, one of only three projects to do so, alongside adding a primary bedroom suite and new roofing. The average across all projects surveyed was 8.2.
The same report found kitchen upgrades were the project Realtors reported the largest increase in demand for, at 48 percent, ahead of new roofing at 43 percent and bathroom renovation at 35 percent. And when homeowners were asked what mattered most about the result, the leading answer was increased functionality and livability.
NAR’s deputy chief economist Jessica Lautz framed the gap directly, noting that the joy homeowners experience after a remodel and the actual cost recovery are two different things, and that Realtors may recommend different strategies when the goal is resale value specifically.
The practical takeaway
- Selling soon: keep scope modest and choices broad. A well-executed refresh with neutral finishes recovers better than a personalized gut renovation.
- Staying five years or more: optimize for how you live. Functionality and livability is what homeowners themselves report as the most valuable outcome, and you will be collecting that return daily.
- Either way: do not exceed the neighborhood ceiling, and do not treat resale percentages as a reason to skip a kitchen you use three times a day.
Permits, Timeline, and Living Through It
Permits
Requirements differ between the City of Chicago and each suburban municipality, and a contractor who works your specific village will know the local process. In general, expect permits to be involved when the project includes structural changes such as removing a wall, new or relocated plumbing, new electrical circuits or a service change, or changes to windows and exterior openings. A straight cosmetic refresh with no plumbing or electrical relocation frequently does not require one.
Pull permits properly. Unpermitted structural or electrical work surfaces at resale during inspection, and resolving it then costs far more than it would have cost to do correctly.
Timeline
Most kitchen remodels run 4 to 8 weeks of on-site work depending on scope, and bathrooms run 2 to 4 weeks. What that figure does not include is the design and procurement phase before demolition begins. Custom cabinetry in particular has a lead time measured in weeks, and ordering it is the gate on everything else. Realistically, plan for a design and ordering period ahead of the construction window rather than assuming work starts the week you sign.
The typical sequence: demolition, rough plumbing and electrical, inspection, drywall and plaster repair, paint, flooring, cabinet installation, countertop templating, countertop installation, backsplash, plumbing and electrical trim, appliances, punch list.
Note the gap in the middle: countertops are templated after cabinets are installed and fabricated afterward, so there is an unavoidable pause of roughly a week or more with cabinets in place and no counters. This is normal and it is not your contractor stalling.
Living through it
- Set up a temporary kitchen elsewhere before demolition: microwave, kettle, coffee, toaster oven, and the refrigerator if it can be relocated
- Pack and label everything from the kitchen in advance. Cabinets must be empty on day one
- Agree the dust containment plan, the daily cleanup expectation, and where materials will be staged
- Agree working hours in advance, which is not optional in a condo building
- Expect the loudest week to be the first one
Choosing a Contractor
Ask these, and ask for documents rather than assurances:
- License and bond. Ask for the number and verify it. Illinois requires licensed plumbers for plumbing work specifically.
- Certificate of insurance. Request it directly from the insurer, naming you, not a photocopy.
- A fixed written price with a detailed scope. A quote that reads as a single number with no line items is not a quote, it is an opening position.
- How allowances are handled. If tile, fixtures, or appliances are carried as allowances, ask what happens when you select above or below them.
- The change order policy in writing. Every project has changes. What matters is whether they are documented and priced before the work happens.
- Who is actually on site. One crew or a rotating cast of subcontractors changes the experience substantially.
- Recent local references and a portfolio. Ideally projects in homes of a similar age and type to yours.
AMG Proline is licensed and bonded in Illinois (IL. #104.020448), has been BBB accredited since April 2017, and holds Best of Orland Park and Best of Burbank recognition in the Construction Company category. Full documentation is on the certificates and awards page, and completed projects are in the portfolio.
Frequently Asked Questions
How many sinks does a kitchen need?
One sink is enough for most kitchens. A second prep sink is worth adding when two people regularly cook at the same time, when the island is a genuinely separate work zone rather than a few steps from the main sink, or when you entertain often and want a beverage zone that stays out of the cleanup area. If the island is your only large prep surface, adding a sink cuts that surface in half and usually costs you more than it gains.
Should I choose quartz, granite, or marble for my countertops?
Quartz is engineered and non-porous, so it never needs sealing and resists stains well, but it is less heat resistant than natural stone and can discolor in prolonged direct sunlight. Granite is natural stone with excellent heat resistance and a unique appearance in every slab, but it is porous and needs periodic sealing. Marble is the most beautiful and the most demanding, because it etches permanently when it contacts acids like lemon, wine, or vinegar, and it scratches more easily than granite. For busy family kitchens quartz is usually the right answer, for heavy cooks granite is excellent, and marble suits homeowners who genuinely accept the patina or who use it on an island or backsplash rather than the full run.
How much room do I need for a kitchen island?
An island needs at least 42 inches of clear aisle on every side that gets used, and 48 inches where two people work or where there is traffic behind seating. With standard 24 inch deep cabinets on both sides and a 24 inch deep island, that puts the practical minimum room width at about 13 feet. With cabinets on one side only, about 11 feet. A useful island is at least 4 feet by 2 feet, and each seat needs 24 inches of width with a 15 inch knee overhang at standard 36 inch counter height. If the room is narrower than about 11 feet, a peninsula is the better solution.
Do I need a pantry in my kitchen?
You need pantry capacity if you buy in bulk or if dry goods currently overflow into a hall closet, the basement, or the garage. A walk-in pantry needs roughly 5 by 5 feet with a 36 inch clear path, and a reach-in closet pantry works at about 24 to 30 inches deep with shelves 12 to 16 inches deep. Where neither fits, a tall cabinet run with pullout interiors or a narrow pullout pantry gets you most of the benefit. Many older Chicago homes had a pantry originally that was later converted, and restoring that function is often the simplest solution.
Should I open up my closed kitchen to the living or dining room?
It depends on what you lose. Opening a wall gains sightlines, light, and hosting space, but it costs you upper cabinet storage, lets noise and cooking smells travel through the whole floor, and makes mess permanently visible. If the wall is load bearing, a structural engineer must specify a beam and the posts carrying it, and any ducting, plumbing vents, or electrical inside that wall has to be rerouted. Consider the middle options first: a widened cased opening, a pass-through above counter height, or partial removal terminating in a peninsula often deliver most of the benefit for far less cost and disruption.
How much storage should a kitchen have?
Start by emptying every cabinet and sorting into daily, weekly, seasonal, and never. What remains is your real requirement, and it is usually smaller and differently shaped than what you have. Then measure your current cabinet run in linear feet and count your drawers so your designer has a baseline to beat. The two changes that add the most usable storage without adding square footage are converting base cabinets from doors to full-extension drawer banks, and removing the soffit so wall cabinets run to the ceiling.
What size range hood do I need?
The hood should be at least as wide as the cooking surface, and extending 3 inches past each side captures noticeably better. A common sizing rule is roughly 100 CFM per linear foot of cooktop for electric, or total burner BTU divided by 100 for gas. Mounting height is typically 24 to 30 inches above the cooking surface, but always follow the manufacturer’s specification. Duct outside rather than recirculating wherever it is physically possible, since a recirculating hood does nothing for heat or moisture. High-CFM hoods may trigger makeup air requirements, commonly around 400 CFM, so confirm what applies in your municipality.
Is gas or induction better for a kitchen remodel?
Induction heats faster, controls more precisely, keeps the cooking surface relatively cool, is the easiest to clean, and puts far less waste heat into the room, but it requires magnetic cookware and a dedicated 240 volt circuit, which in an older Chicago home may mean panel work. Gas gives instant visual feedback, works with any pan, and still functions during a power outage, but it is less efficient and adds heat and combustion byproducts that make good ventilation more important. If there is no gas line at the cooking location and running one is difficult, induction is often the better answer.
Should I reface my cabinets or replace them?
Open a base cabinet and look at the box rather than the door. If the sides are solid, square, and dry, and the drawer boxes still run true, refacing is a legitimate way to save money. If the sink base is swollen, the boxes are sagging particleboard, or there are no drawers where you need drawers, refacing keeps the problem behind nicer doors. The hard limit is that refacing cannot change the layout, so if your complaint is that there is nowhere to put anything, you need new cabinetry.
What kitchen colors should I choose?
Choose in order from fixed to flexible: anything you are keeping first, then cabinetry, countertop, backsplash, paint, and hardware last. Warm neutrals have replaced cool grays, natural wood has returned strongly alongside painted cabinetry, and two-tone schemes with a contrasting island are the low-risk way to use color. Test large samples on the actual walls at several times of day, because north-facing Chicago kitchens receive cool light that changes how grays and whites read. If you plan to sell within three years, keep cabinets and counters neutral and put personality into the backsplash, hardware, lighting, and paint, since those are the cheapest elements for a buyer to change.
Does a kitchen remodel increase home value?
It depends on scope. Zonda’s Cost vs. Value report found the minor kitchen remodel was the only interior project to reach the national top five for cost recovered, and that the more complex and personalized a project is, the lower the percentage recovered at sale. Separately, the NAR and NARI 2025 Remodeling Impact Report gave a kitchen upgrade a perfect Joy Score of 10, against an 8.2 average across all projects, and found kitchen upgrades were the project with the largest reported increase in homeowner demand at 48 percent. In short, a modest kitchen update recovers the most at resale, while a larger remodel delivers its return mainly through daily use.
How long does a kitchen remodel take?
Most kitchen remodels take 4 to 8 weeks of on-site work depending on scope. That does not include the design and ordering period beforehand, and custom cabinetry lead times are typically the gate on the schedule. Expect an unavoidable pause of roughly a week or more between cabinet installation and countertop installation, because countertops are templated after the cabinets are set and fabricated afterward.
Do I need a permit for a kitchen remodel in Chicago?
Requirements differ between the City of Chicago and each suburban municipality. Generally, permits are involved when the project includes structural changes such as removing a wall, new or relocated plumbing, new electrical circuits or a service change, or changes to exterior openings. A cosmetic refresh with no plumbing or electrical relocation frequently does not require one. Pull permits properly, because unpermitted structural or electrical work surfaces during inspection when you sell.
Talk Through Your Kitchen With Someone Who Builds Them
Every question in this guide is one we work through with homeowners at the kitchen table. AMG Proline handles design, permits, cabinetry, countertops, plumbing, electrical, and finish work with one team, at a fixed written price.
Visit the showroom at 4711 W 135th St, Crestwood, IL 60418, Monday through Saturday, 8:00 AM to 7:00 PM. Or call (708) 979-3298 and we will come to you.
Request a free quote or explore kitchen remodeling in Chicago.